

Introduction
In recent years, artisan pizza has surged in popularity, transforming a simple meal into a gourmet experience. The secret to elevating this beloved dish lies in the dough. A good pizza dough serves as the foundation for an unforgettable pizza, contributing to its texture, flavor, and overall enjoyment. While frozen or store-bought dough can suffice in a pinch, nothing compares to the satisfaction of crafting your own pizza dough from scratch. The process allows you to control the ingredients, experiment with flavors, and, ultimately, enjoy the pride that comes with creating a culinary masterpiece right in your own kitchen.
Homemade artisan pizza dough can achieve a perfect balance of chewiness and crispiness, all while imparting a rich, complex flavor that store-bought alternatives simply cannot match. The beauty of this dough lies in its simplicity; with just a few basic ingredients and a little patience, you can achieve that pizzeria-quality crust that tantalizes taste buds. As we embark on this journey to craft our perfect artisan pizza dough, prepare to discover the joy of baking and the delicious rewards that await.
Understanding the Ingredients
To create the perfect artisan pizza dough, one must first understand the role of each ingredient. Each component contributes to the overall structure, flavor, and texture of the pizza crust, making it essential to choose quality ingredients and understand their functions.
All-Purpose Flour
The cornerstone of any pizza dough is flour, and opting for high-quality all-purpose flour is crucial. All-purpose flour has a moderate protein content, typically around 10-12%, which strikes a balance between elasticity and tenderness. This protein forms gluten when mixed with water and kneaded, creating the chewy texture characteristic of artisan pizza crust. While some may experiment with bread flour for a chewier crust or “00” flour for a more authentic Neapolitan style, all-purpose flour remains the go-to choice for a versatile and easily manageable dough.
Sea Salt
Salt is more than just a flavor enhancer; it plays a pivotal role in the dough-making process. Sea salt enhances the flavor of the pizza crust and helps regulate fermentation by controlling yeast activity. It also strengthens gluten structure, contributing to the dough’s overall texture. When selecting salt for your dough, opt for coarse sea salt to ensure even distribution and to avoid clumping in the mixing process.
Sugar
Sugar may seem like an unusual addition to pizza dough, but it serves multiple purposes. Firstly, sugar acts as food for the yeast during fermentation, promoting a more robust rise and flavor development. Additionally, sugar enhances browning during baking, creating an appealing golden crust. While the amount of sugar in pizza dough is typically minimal, it can significantly impact the dough’s flavor and appearance.
Instant Yeast
When it comes to yeast, instant yeast is a favorite among many home bakers. Unlike active dry yeast, which requires activation in warm water before use, instant yeast can be mixed directly with the dry ingredients. This convenience simplifies the dough-making process, allowing for quicker preparation. Instant yeast also has a longer shelf life and often leads to a more consistent rise, making it an excellent choice for crafting artisan pizza dough.
Warm Water
Water is essential for activating yeast and hydrating the flour. The temperature of the water is critical; it should be warm but not hot—typically around 100°F to 110°F (37°C to 43°C). This temperature range creates an optimal environment for yeast activation without killing the yeast. The right amount of water also determines the dough’s hydration level, which affects the crust’s texture and chewiness.
Olive Oil
Incorporating olive oil into your pizza dough adds flavor and moisture. Olive oil contributes to a tender crust and helps create a slightly crisp exterior when baked. Additionally, it can enhance the dough’s extensibility, making it easier to shape. Using high-quality extra virgin olive oil can also add a depth of flavor that elevates your pizza crust even further.
Cornmeal
While not a direct ingredient in the dough itself, cornmeal serves an essential purpose in the pizza-making process. When it comes time to shape your dough, sprinkling cornmeal on your work surface or pizza peel prevents sticking and adds a delightful texture to the crust. It can also impart a subtle flavor that complements the overall pizza experience.
The Dough-Making Process
Now that we understand the ingredients that will shape our artisan pizza dough, let’s delve into the dough-making process itself. This phase involves several key steps, each critical to achieving the perfect crust.
Mixing the Dry Ingredients
The first step in crafting your pizza dough is to mix the dry ingredients thoroughly. In a large mixing bowl, combine your all-purpose flour, sea salt, sugar, and instant yeast. It’s vital to ensure even distribution of these components, as this will directly affect the dough’s rise and flavor.
To achieve a thorough mix, consider using a whisk or a fork to aerate the flour and break up any clumps. This step may seem minor, but it ensures that the yeast is evenly dispersed throughout the flour, promoting consistent fermentation. Once the dry ingredients are well mixed, you’re ready to move on to the next step.
Creating the Dough
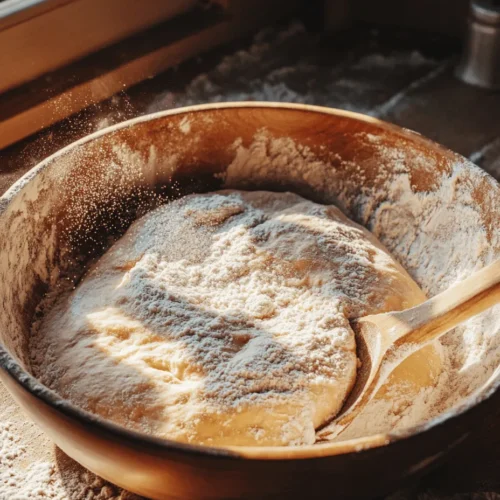
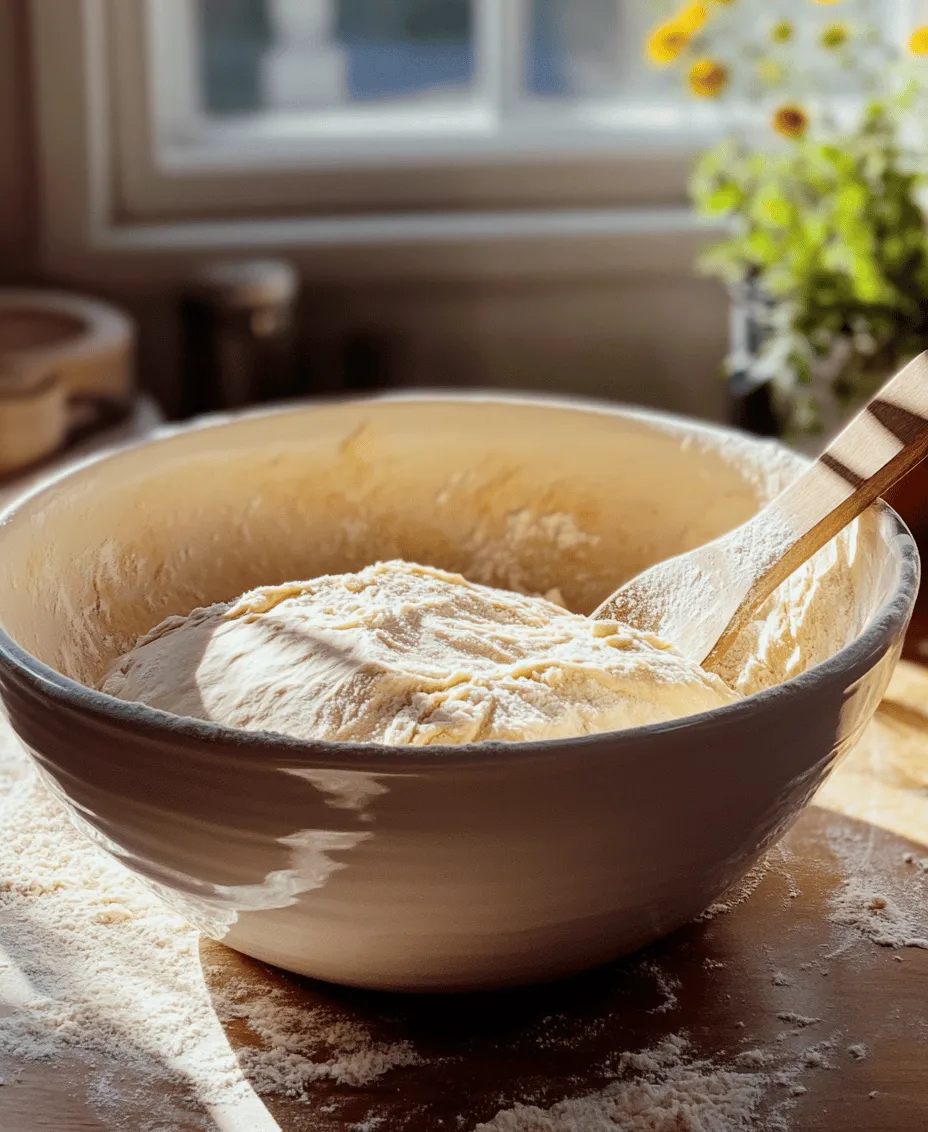
With your dry ingredients combined, it’s time to incorporate the wet ingredients. Make a well in the center of your flour mixture and add the warm water and olive oil. Using a spatula or your hands, gently mix the flour into the liquid, starting from the edges of the well and working your way inward. As you combine the ingredients, you’ll notice the dough beginning to come together—a stage often referred to as “shaggy dough.”
At this point, you may find that the dough feels sticky or somewhat uneven. This is a normal part of the process, and it will come together more cohesively once kneading begins.
Kneading Techniques
Kneading is a crucial step in developing the gluten structure of your pizza dough, which is essential for achieving that characteristic chewy crust. To knead the dough, transfer it to a lightly floured surface and begin working with your hands. Start by pressing the dough down with the palms of your hands, then fold it over itself and rotate it a quarter turn. Repeat this process for about 8-10 minutes, or until the dough becomes smooth and elastic.
It’s important to resist the urge to add too much extra flour during this process, as over-flouring can lead to a dry and tough crust. Instead, focus on using just enough flour to prevent sticking. If the dough feels too sticky, a light dusting on your work surface and hands can help. You’ll know the dough is ready when it springs back gently when poked and has a silky, elastic texture.
The First Rise: Proofing the Dough
Once your dough is kneaded to perfection, it’s time for the first rise, also known as proofing. This stage is vital for allowing the yeast to ferment and the dough to expand. Transfer your kneaded dough into a clean, lightly oiled bowl, turning it to coat the surface in oil. This helps prevent a crust from forming as the dough rises.
Cover the bowl with a damp kitchen towel or plastic wrap to retain moisture and place it in a warm, draft-free area. Allow the dough to rise for about 1-2 hours, or until it has doubled in size. You can check for readiness by gently pressing your finger into the dough; if the indentation remains, it’s time to move on to the next stage.
As you wait for the dough to rise, take a moment to appreciate the transformation happening within that simple mixture of flour, water, and yeast. The anticipation of what’s to come—delicious homemade pizza topped with your favorite ingredients—adds to the excitement of this culinary adventure.
In the next section, we will explore the subsequent steps in crafting your perfect artisan pizza, including shaping, the second rise, and baking. Stay tuned as we delve deeper into this exciting journey of homemade pizza perfection!
Ideal Temperature and Conditions for Dough Rising
Creating the perfect artisan pizza dough starts with ensuring the right temperature and conditions for rising. Yeast thrives in warmth, so aim for a warm, draft-free area in your kitchen. The ideal temperature for dough rising is between 75°F to 80°F (24°C to 27°C). If your kitchen is cool, you can create a warm environment by preheating your oven to the lowest setting for just a few minutes, then turning it off. Place your covered bowl of dough inside the oven, leaving the door slightly ajar to prevent overheating.
Humidity also plays a crucial role in dough rising. A slightly humid environment can help the dough retain moisture, which is essential for achieving the right texture. If your kitchen is dry, you can place a small bowl of water inside the oven with the dough to increase humidity. Look for the dough to rise significantly, doubling in size, which typically takes about 1 to 2 hours depending on the conditions.
How to Recognize When the Dough Has Doubled in Size
Recognizing when your dough has risen adequately is key to achieving the perfect artisan pizza crust. The most straightforward way to check is by using the “poke test.” Gently press your finger into the dough; if the indentation slowly springs back but leaves a slight mark, your dough is ready. Additionally, visually inspect the dough; it should appear puffy and have expanded to roughly double its original size. These indicators will ensure you’ve allowed enough time for the yeast to work its magic.
Shaping and Dividing the Dough
Once your dough has risen beautifully, it’s time to shape and divide it. Start by lightly flouring your work surface to prevent sticking. Handle the risen dough gently to avoid deflating it entirely; you want to maintain the air bubbles that have formed. Carefully transfer the dough onto the floured surface, and using your hands, gently stretch the dough into a rectangle.
Next, it’s time to punch down the dough. Use your fist to gently deflate the dough, pressing down in the center and working your way to the edges. This process redistributes the yeast and allows for an even texture throughout the crust. After punching down the dough, divide it into equal portions based on your desired pizza size—typically, a single pizza is about 8 ounces. Shape each portion into a ball by folding the edges into the center and rolling it snugly against the work surface.
Importance of Resting the Dough After Shaping
Resting the dough is a crucial step that is often overlooked. After shaping and dividing your dough, cover it with a damp cloth and let it rest for about 15 to 30 minutes. This resting period allows the gluten to relax, making it easier to stretch and shape later. Resting also contributes to a chewier texture in the final pizza crust. If you skip this step, you might find the dough snapping back when you try to stretch it, leading to an uneven base.
Preparing to Bake: Preheating the Oven
Before you start stretching your dough, it’s essential to prepare your baking equipment. Preheating your oven to its maximum temperature, usually around 475°F to 500°F (245°C to 260°C), is critical for achieving the perfect pizza crust. High heat contributes to a crisp texture, helping to create that desired char on the bottom of the pizza.
Using a pizza stone or a baking sheet is highly recommended. A pizza stone retains heat effectively and creates a beautifully crisp crust by mimicking the intense heat of a traditional pizza oven. If you’re using a stone, preheat it in the oven for at least 30 minutes before baking. If you’re using a baking sheet, place it upside down in the oven; this will help achieve a similar effect by allowing the pizza to bake directly on a hot surface.
Stretching the Dough
With your dough rested and your oven preheated, it’s time to stretch your dough into a pizza base. Start by lightly flouring your work surface again. Place a dough ball in the center and use your fingertips to gently press down, creating a small disc. As you work, keep pushing the dough outward, allowing gravity to help shape it.
For a traditional pizza base, you can use your hands to lift the dough, letting it hang and stretch from its own weight. This technique helps create a thin center with a thicker edge, which is perfect for holding toppings. If you prefer a thicker crust, focus on leaving more dough around the edges while stretching the center to your desired thickness.
Tips for Creating a Thicker Crust Edge
If you’re aiming for a thicker crust edge, leave about an inch of dough untouched along the perimeter while stretching. For added flavor and texture, consider brushing the edges with a mixture of olive oil and minced garlic before adding your toppings. This will enhance the crust’s richness and create a beautiful golden color as it bakes.
Adding Toppings
Now comes the fun part—adding toppings! The possibilities are endless, but a few classic combinations stand the test of time. Traditional toppings include a base of tomato sauce, mozzarella cheese, and fresh basil. For a twist, consider using pesto instead of tomato sauce or experimenting with different cheeses such as goat cheese or gouda.
When adding toppings, balance is key. Aim for a mix of flavors and textures. Pair creamy cheeses with tangy sauces, and combine crunchy vegetables with savory meats. Fresh ingredients like arugula or sliced tomatoes should be added after baking to maintain their freshness and vibrancy. Avoid overloading the pizza, as too many toppings can lead to a soggy crust.
Baking the Pizza
Once your pizza is topped to perfection, it’s time to bake! Carefully transfer your pizza onto the preheated pizza stone or baking sheet. The ideal baking time is typically between 10 to 15 minutes, but this can vary based on your oven and the thickness of your crust.
To check if the pizza is perfectly baked, look for a golden-brown crust and bubbling cheese. If you’re using mozzarella, it should be melted and slightly browned. For an extra crispy crust, consider rotating the pizza halfway through the baking time to ensure even cooking.
Conclusion
Crafting the perfect artisan pizza dough is a rewarding process that combines science and creativity. From selecting the right ingredients to mastering the art of dough shaping and baking, each step contributes to an unforgettable culinary experience. Don’t hesitate to experiment with different flavors, toppings, and techniques to make the pizza your own.
Sharing homemade pizza with family and friends not only brings joy but also creates lasting memories around the dining table. The beauty of pizza is its versatility; there’s always room for innovation while respecting the craft of traditional pizza-making. So roll up your sleeves, gather your loved ones, and dive into the delightful world of artisan pizza. Your next pizza night is bound to be a delicious adventure!